There is no one definitive answer to this question. Depending on the desired outcome, there are a variety of methods that can be used to create a hand made clipping photoshop effect. Some common techniques include using layer masks, the pen tool, and adjustment layers.
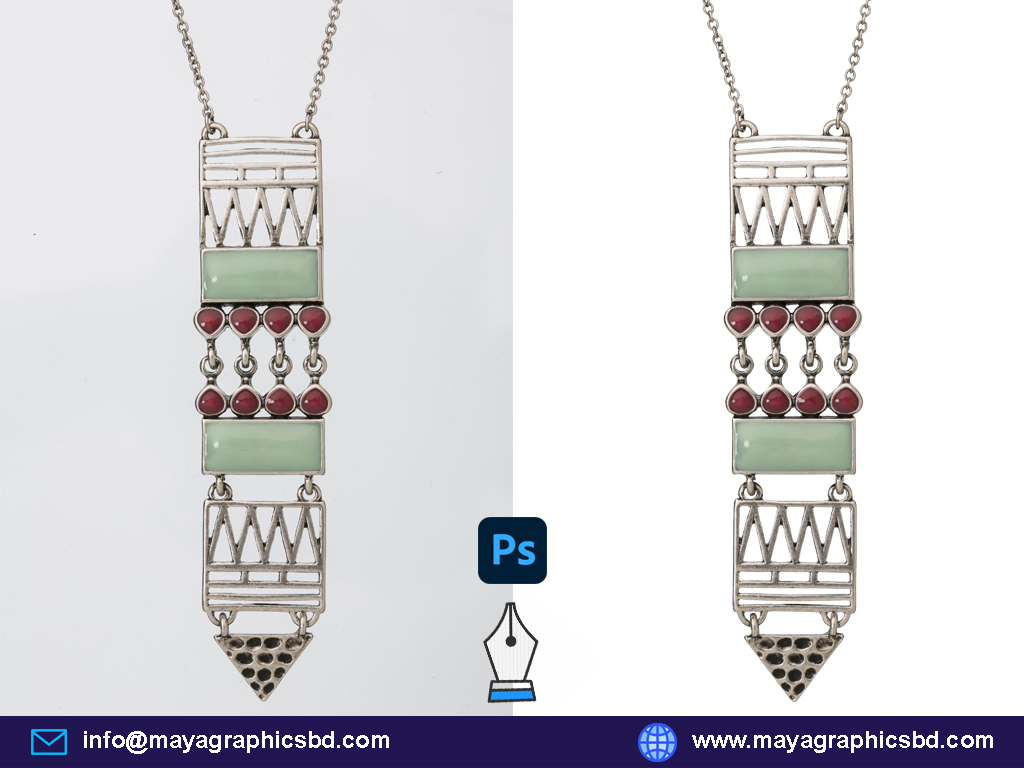
There’s something special about hand made clipping photoshop that you can’t get from digital editing. Maybe it’s the fact that someone took the time to physically cut out each piece by hand, or maybe it’s the more organic look and feel of the final product. Whatever the reason, there’s no denying that hand made clipping photoshop has a certain charm to it.
If you’re interested in giving hand made clipping photoshop a try, there are a few things you’ll need to know. First, you’ll need to find a good image to use as your base. A high-quality photo with clear lines and sharp edges will make your life much easier.
Once you have your base image, print it out on cardstock or another heavy paper so that it’s easy to work with. Next, start cutting out your pieces. It’s important to take your time with this step and be as precise as possible.
The better your cuts are, the better your final product will look. When you’re done cutting out all of your pieces, begin assembling them on top of your base image using Photoshop or another editing program. Again, take your time and line everything up perfectly before moving on.
Once you’re happy with how everything looks, save your file and print it out! You now have a one-of-a-kind hand made clipping photoshop collage!
How Do I Make a Clipping in Photoshop?
In Photoshop, the clipping command is under the edit menu. To make a clipping, first make a selection of the area you want to clip. Then, go to Edit > Clipping > New Clipping.
This will create a new layer that is clipped to the selection.
What is the Difference between a Clipping Mask And a Layer Mask?
Clipping masks and layer masks are both tools used in image editing to hide or reveal parts of a layer. A clipping mask is created by adding a mask to a layer; the mask defines which parts of the layer are visible. A layer mask is similar, but it is added to a layer using the Add Layer Mask command, and it allows you to paint on the mask to define which parts of the layer are visible.
How Do I Make a Picture Clipping?
If you want to make a picture clipping, the easiest way is to use an online tool like Fotor. First, upload the image you want to clip and then select the “Clip” option from the left menu. You can then choose how you want to clip your image, including options like “Free Hand”, “Rectangle”, or “Polygon”.
After you’ve selected your clipping path, simply click on the “Done” button and your image will be clipped.
How Do I Create a Clipping Path in Photoshop Cc?
There are a few ways to create clipping paths in Photoshop CC. The first way is to use the pen tool. With the pen tool, you can draw a path around the object you want to clip out.
To do this, simply click and drag your mouse around the object. When you’re done, right-click on the path and select “Make Clipping Path.” Another way to create clipping paths is to use the Quick Selection Tool.
With this tool, you can quickly select an object by clicking and dragging your mouse over it. Once the object is selected, go to Select > Modify > Expand and enter a value of 2 pixels. This will create a selection border around the object.
Next, go to Select > Inverse to select everything except for the object. Finally, press Cmd/Ctrl+Shift+I to invert the selection and then Cmd/Ctrl+Opt/Alt+2 to create a clipping mask.
Clipping Mask in Photoshop Shortcut
A clipping mask is a layer in Photoshop that allows you to use the shape of one layer to mask the layers below it. This is a great way to create complex shapes and designs, and it’s a handy shortcut to know! Here’s how it works:
1. Create your base shape. This can be done by creating a new layer and drawing a shape with the Pen tool, or by using an existing image or layer. 2. Add the layers that you want to use as your clipping mask.
These can be images, text layers, or anything else you want to use to create your design. 3. Select both the base shape layer and the topmost layer in your clipping mask stack. 4. Go to Layer > Create Clipping Mask, or press Ctrl/Cmd+Alt+G on your keyboard.
That’s it! Your topmost layer will now be clipped to the shape of your base layer, allowing you to create complex shapes and designs quickly and easily.
Clipping Mask Photoshop
A clipping mask in Photoshop is a way to create an image within another image. The most common use for this is to create a custom shape or design within a photo. To create a clipping mask, first open the layer you want to use as the mask and select it.
Then, click on the “Create Clipping Mask” icon at the bottom of the Layers panel. This will make everything on that layer invisible except for what’s inside the selection. If you need to edit the clipping mask later, double-click on the “Create Clipping Mask” icon to re-enter editing mode.
From here, you can make changes to any of the layers below it and they will still be clipped to the original shape.
Clipping Mask – Photoshop Text
A clipping mask is a layer in Photoshop that allows you to use the shape of one layer to mask other layers. This is especially useful for text, as you can use the text layer to clip the image or color behind it. To create a clipping mask, simply select the layer you want to use as a mask and click on the “Create Clipping Mask” button in the layers panel.
How to Create Clipping Mask in Photoshop Windows
If you’re a Windows user, you may be wondering how to create a clipping mask in Photoshop. Clipping masks are very useful for isolating images or elements within an image, and they’re easy to create once you know how. Here’s a quick guide on how to do it:
1. Open your image in Photoshop and select the layer that you want to use as the base of the clipping mask. 2. Next, click on the “Create new layer” icon at the bottom of the Layers panel. 3. A new layer will appear above your selected layer.
Now we need to fill this layer with black; you can do this by going to Edit > Fill > Black. 4. With the black fill layer still selected, go to Layer > Create Clipping Mask. Alternatively, you can press Ctrl+Alt+G (Windows) or Cmd+Option+G (Mac).
5. And that’s it! You should now see your selected layer clipped into place by the black fill layer above it. Any changes you make to the clipped layer will now only affect the area within the clipping mask bounds – perfect for isolated editing!
Transparent Clipping Mask Photoshop
A clipping mask is a Photoshop feature that allows you to control which parts of a layer are visible. A transparent clipping mask means that the entire layer is visible, regardless of the shape of the layer. This can be useful if you want to create a complex shape or design, but don’t want to worry about making sure all the parts are perfectly aligned.
Clipping Mask Not Working Photoshop
If you’re having trouble getting your clipping mask to work in Photoshop, there are a few things you can try. First, make sure that the layer you’re trying to clip is directly above the layer you want to clip it to. If it’s not, simply drag it up in the layer stack until it is.
Next, check to see if your clipping mask is inverted. An easy way to do this is to click on the layer mask thumbnail in the Layers panel. If your clipping mask is inverted, you’ll see a white border around the thumbnail.
To fix this, simply click on the Invert button at the bottom of the Layers panel. If neither of these solutions work, try creating a new clipping mask from scratch. To do this, select both layers in the Layers panel and then go to Layer > Create Clipping Mask or use the shortcut Command + Option + G (Mac) / Control + Alt + G (PC).
Clipping Path Photoshop
A clipping path is an image editing technique that allows you to isolate a specific area of an image. This can be useful if you want to remove a background from an image or if you want to focus on a specific element in an image. Clipping paths are created using the pen tool in Photoshop.
In this blog post, we’ll show you how to create a clipping path in Photoshop and how to use it to isolate an element in an image.
Clipping Mask Illustrator
A clipping mask is an object that masks other objects in Illustrator. When you create a clipping mask, the objects inside the mask are visible, but the objects outside the mask are hidden. You can use clipping masks with images, shapes, and text.
To create a clipping mask, you need two objects: a base object and a masking object. The base object is the one that will be visible after you create the clipping mask. The masking object is the one that will be used to create the masked effect.
Here’s how to create a clipping mask in Illustrator: 1. Select both the base object and the masking object. 2. Go to Object > Clipping Mask > Make (or use the shortcut Cmd+7).
3. That’s it! Your base object is now clipped by the shape of your masking object. You can also release a clipping mask by going to Object > Clipping Mask > Release (or using the shortcut Cmd+Shift+7).
Conclusion
This blog post is about a hand made clipping photoshop. The author has used this software to create a beautiful and unique piece of art.
Itís hard to come by well-informed people in this particular topic, but you sound like you know what youíre talking about! Thanks